博文

目前显示的是标签为“翻墙”的博文

如何使用Just My Socks 快速设置Shadowsocks科学上网(Mac版为例,其他系统类似)(SSR/SS)

图片
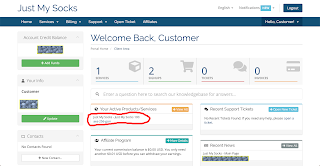
准备工作: 下载Shadowsocks客户端,请参见: https://geekwagner.blogspot.com/2019/02/shadowsocks-clients-ss-for_28.html (下载ShadowsocksX-NG.app.x.x.x.zip就行,x.x.x是版本号) 注册Just My Socks账号: 点此进入 Step 1: 解压 解压下载好的ShadowsocksX-NG.app.x.x.x.zip,会得到一个名为ShadowsocksX-NG.app的应用(小飞机的图标),将它复制到你的Mac的应用程序下,便可以在launchpad中找到,方便日后使用。 Step 2: 隐私设置( 非Mac系统不需要此步骤 ) 为顺利打开小飞机,我们需要将在“系统偏好设置”>“安全性与隐私”中,将“允许从以下位置下载的应用”设置为“任何来源”。 点击小锁头,选中“任何来源”。如果“安全性与隐私”设置中找不到“任何来源”这一项,则请进行如下设置: 1. 打开“终端”; 2. 输入命令 sudo spctl --master-disable 回车后输入你的mac密码,注意输入密码时屏幕不会有显示,输入完毕回车即可,如果没有提示错误,则说明成功。 3. 重新打开“安全性与隐私”,此时已经可以看到“任何来源”。点击小锁头,输入密码后,选择“任何来源”,然后返回。 Step 3: 打开ShadowsocksX-NG 双击小飞机,打开ShadowsocksX-NG。 便可以在右上角看到一个小飞机,说明成功安装。 Step 4: 注册Just My Socks 点此注册 进入Just My Socks官网,点击右上角“Register”或者“注册”,依照提示注册。注册完成后,在菜单栏中点击“Store”>“Browse all”,购买合适的套餐。 建议购买2.88刀每月的套餐,只要不乱看视频乱下载,肯定是足足的够用。建议月付,防止因为不可名状的原因造成太大损失。 Step 5: 获取服务器信息 登陆Just My Socks网站,点击菜单里的“Home”或者“首页”,选择右边页面中的“Your Active Products/Service...

About Netgear WNDR4300v1 5GHz missing problem

After flashing OpenWRT to Netgear WNDR4300v1, I surprisingly found that 5GHz wireless card was missing. And I tried to flash back to OEM version but ended up in dead loop rebooting. The 5GHz wifi of WNDR4300 is provided by AR9580 which is connected by the PCI interface. I used dmesg to inspect the log of openwrt and found that PCI found nothing when starting. Was the chip broken? I nearly gave up and tried to disconnect the router with its power and went to dinner. After the dinner, I powered up the router and -- it just worked! Here is the log from dmesg. [     0.391671] PCI host bridge to bus 0000:00 [     0.396044] pci_bus 0000:00: root bus resource [mem 0x10000000-0x13ffffff] [     0.403409] pci_bus 0000:00: root bus resource [io   0x0000] [     0.409340] pci_bus 0000:00: root bus resource [??? 0x00000000 flags 0x0] [     0.416575] pci_bus 0000:00: No busn resource found for root bus, will use [bus 00-ff]...

Compile specific OpenWRT version and change the mtdlayout

1. Clone OpenWRT project from github git clone https://github.com/openwrt/openwrt.git 2. Find the release info from their github page. Click the 'X releases' tab can copy the commit number of the release you want. 3. Enter the folder of your cloned openwrt and reset header to that release. git reset --hard <commit number> 4. Install feeds. ./scripts/feeds update -a ./scripts/feeds install -a 5. Config. You must choose your target according to your router. make menuconfig e.g.: For router Netgear WNDR4300 * Target System => Atheros AR7xxx/AR9xxx * Subtarget  => Generic devices with nand flash * Target Profile => Netgear WNDR4300v1 * You may need LuCi Web admin interface. Please choose LuCi/Collections/luci 6. Download all packages before make make download 7. Make. (If you are in China, you may encounter some errors caused by GFW. Try to use a proxy to solve the problem.) make 8. The image will be in ./bin/targets/<you...

Configure shadowsocks transparent proxy + gfwlist(PAC) on OpenWRT Router

You must have Shadowsocks services which can be gained in the following way before actually starting to configure. Purchase Shadowsocks Service directly online. Recommendation:  Just My Socks Quick Shadowsocks configuration using Just My Socks, please click here . Build the service yourself. Please refer to  Configure V2Ray(Shadowsocks mode) + 加速:普通BBR/魔改BBR on KVM VPS (Tested on Ubuntu 16.04) . The environment this article used, FYI: OpenWrt 18.06.1/LuCI openwrt-18.06 The Overall Idea: DNS part: if the requested address is in gfwlist     forward DNS request to 127.0.0.1:5353 which is listened by dns-forwarder     dns-forwarder forwards the request to 8.8.8.8 for translating     8.8.8.8 is in gfwlist, so match iptables rules and is fowared to 1080     ss-redir listen on port 1080, foward request to shadowsocks server else     use public DNS servers or the DNS servers provided by the ISP other da...

一份可用的haproxy配置,ss-in,ss-out

global   log 127.0.0.1   local0           #[日志输出配置,所有日志都记录在本机,通过local0输出]   log 127.0.0.1   local1 notice    #定义haproxy 日志级别[error warringinfo debug]   daemon                        #以后台形式运行harpoxy   nbproc 1                         #设置进程数量   pidfile /home/alex/haproxy.pid   ulimit-n 51200                   #ulimit 的数量限制   maxconn 8192                    #默认最大连接数,需考虑ulimit-n限制   #chroot /usr/local/haproxy defaults   log global   mode tcp                  #默认的模式mode { tcp|http|health },tcp是4层,http是7层,health只会返回OK   retries 3                 #两次连接失败就认为...

Openwrt路由器上配置shadowsocks透明代理+gfwlist(PAC)

Shadowsocks 服务推荐: Just My Socks 推荐理由:价格便宜,支持月付,安全灵活。 本文配置的前提是已经有shadowsocks服务。你可以通过购买或者自行搭建的方式获得。以下是链接: 直接购买网上的服务,此处推荐 Just My Socks 快速Just My Socks配置Shadowsocks,请点 这里 。 自行搭建,请参考 KVM VPS上配置V2Ray(Shadowsocks mode) + 加速:普通BBR/魔改BBR(测试于Ubuntu 16.04) 本文所使用的环境,仅作参考: OpenWrt 18.06.1/LuCI openwrt-18.06 整体思路: DNS部分: if 访问地址在gfwlist中     DNS请求转发到127.0.0.1:5353的dns-forwarder的监听端口     dns-forwarder转发到8.8.8.8进行解析     8.8.8.8在gfwlist中,通过匹配iptables规则转发到1080端口     ss-redir监听1080端口,通过shadowsocks代理服务器转发请求 else     正常使用公共DNS或者ISP提供的DNS服务器 其他数据: if 访问地址在gfwlist中     通过匹配iptables规则转发到1080端口     ss-redir监听1080端口,通过shadowsocks代理服务器转发请求 else     正常访问 步骤1:依赖包安装( 非常重要 ) 本文所有的操作都基于SSH和Web管理界面操作。 首先通过SSH添加GPG Key,这样之后添加的源才能通过签名验证: wget http://openwrt-dist.sourceforge.net/packages/openwrt-dist.pub -O /tmp/openwrt-dist.pub opkg-key add /tmp/openwrt-dist.pub 然后在OpenWRT Web管理界面,“...

KVM VPS上配置V2Ray(Shadowsocks mode) + 加速:普通BBR/魔改BBR(测试于Ubuntu 16.04)

首先, 你需要在KVM架构的VPS上部署服务,因为BBR不支持OpenVZ. 出于价格的原因,推荐Bandwagonhost和Vultr. 以下是链接: Bandwagonhost Vultr (或者点击 此处 获取重大优惠, 限时有效) 我建议选择Ubuntu16.04或者之后版本作为OS。在一切就绪并且从本地可以ping通服务器后,SSH连接VPS。 步骤1: V2RAY V2RAY是新一代的数据代理软件,几乎支持所有协议. 此处选择我们熟悉的Shadowsocks作为协议。 在SSH终端中输入以下命令: bash <(curl -L -s https://install.direct/go.sh) 然后使用你熟悉的文本编辑器编辑 '/etc/v2ray/config.json'. 此处,我使用vim作为我的编辑器. 请注意,安装之后, 将会产生一个默认的'config.json'. 你可以将其备份并在原位置使用一样的文件名新建一个'config.json'. vim /etc/v2ray/config.json 在你新建的'config.json'文件中,添加如下内容. { "inbounds" : [ { "port" : 1024 , // 监听端口 "protocol" : "shadowsocks" , "settings" : { "method" : "aes-128-gcm" , "ota" : false , // 是否开启 OTA "password" : "sspasswd" } } ], "outbounds" : [ { "protocol" : "freedom" , "settings" ...

Configure V2Ray(Shadowsocks mode) + 加速:普通BBR/魔改BBR on KVM VPS (Tested on Ubuntu 16.04)

First of all, you will need to deploy a VPS with KVM technology as BBR does not support OpenVZ but KVM. I recommend Bandwagonhost and Vultr because of the price. Here is the link to register and deploy: Bandwagonhost Vultr (Or click here to get a big discount, only available for a LIMITED TIME ) Here I suggest you choose Ubuntu 16.04 or later versions as your OS. After everything is ready and you can successfully ping your server from your local environment, connect to your VPS via SSH. Now let's start. Step 1: V2RAY V2RAY is a new generation of software for data proxy. It supports almost all protocols. Here let's choose Shadowsocks as our protocol with which most of us are familiar. Type in the following command in your SSH terminal to install: bash <(curl -L -s https://install.direct/go.sh) Then use your favorite text editor to edit the configuration file located at '/etc/v2ray/config.json'. Here I use vim as my editor and you can use whatever you a...

Connecting via shadowsocks socks5h via Linux command line

Please note that here we use socks5h instead of socks5. socks5h is a specified version of socks5 which means solve host name via proxy too. export http_proxy="socks5h://192.168.31.114:1081" export https_proxy=$http_proxy

Use proxy chains to access socks proxy in command line in 3 steps - Linux

Step 1. Install sudo apt-get install proxychains Step 2. Config port sudo vim /etc/proxychains.conf Step 3. Usage proxychains <your command>

Using Haproxy + shadowsocks (ha + ss) to setup multi ss backend and load balance

*Install haproxy > sudo apt-get install haproxy *Configure haproxy >vim /etc/haproxy/haproxy.cfg global     ulimit-n 51200     log /dev/log local0     log /dev/log local1 notice     chroot /var/lib/haproxy     pidfile /var/run/haproxy.pid     user haproxy     group haproxy     daemon defaults     log global     mode tcp     option dontlognull     timeout connect 5000       timeout client 50000     timeout server 50000 frontend ss-in     mode tcp       bind $Your_IP:8002     default_backend shadowsocks backend shadowsocks     mode tcp       balance roundrobin         server ss1 $Your_SS_IP1:$Your_SS_PORT1 maxconn 20480         server ss2 $Your_SS_IP2:$Your_SS_PORT2 maxconn 20480 ...

Setup shadowsocks in Ubuntu 16.04 server [client & server]

1.  Setup Server *Install shadowsocks > apt-get install shadowsocks *Configure config file in /etc/shadowsocks/config.json {     "server":"Your server ip",     "server_port":your server port,     "local_address": "127.0.0.1",     "local_port":1080,     "password":"You Password",     "timeout":300,     "method":"aes-256-cfb",     "fast_open": false,     "workers": 1 } *Restart service > sudo /etc/init.d/shadowsocks restart 2. Setup Client *Install shadowsocks client >sudo apt-get install python-pip >sudo pip install shadowsocks *Create config file in /etc/shadowsocks.conf.json {     "server":"Your server ip",     "server_port":your server port,     "local_address":"your local ip",     "local_port":your local port,     "pas...